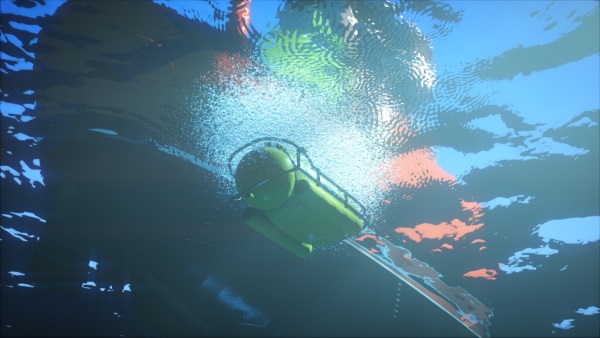
Launch scene

New release: final version of H – Immersion

After months of polishing, we’ve finally released the final version of our latest 64kB intro: H – Immersion. You can read the details, download the binary or just watch the captured video from the production page.

We’re also currently doing a write up to show some of the techniques involved in this intro, which we’re hoping to publish here soon.

How can demoscene productions be so small?

People not familiar with the demoscene often ask us how it works. How is it possible that a 64kB file contain so much? It can seem magical, since a typical music compressed as mp3 can be 100 times as big as our animations – not to mention the graphics. People also ask why other programs or games are getting so big. In 1990, when games had to fit on one or two floppy disks, they used only 1 or 2MB (which is still 20 times as much as our 64kB intros). Modern games now use 10-100 GB.

The reason for that is simple: Software engineering is all about making trade-offs. The typical trade-off is to use more memory to improve performance. But when you write a program, there are many more dimensions to consider. If you optimize on one dimension, you might lose on the other fronts. We make optimizations and trade-offs that wouldn’t make any sense outside the demoscene.

First, we optimize all the data we store in the binary. We use JSON files during the development for convenience, but then we generate compact C++ files to embed in the binary. This saves us a few kilobytes. Is it worth doing it? If you had to make a demo without the 64kB limit, you wouldn’t waste time on this. You’d prefer the 70kB executable instead. It’s almost the same.

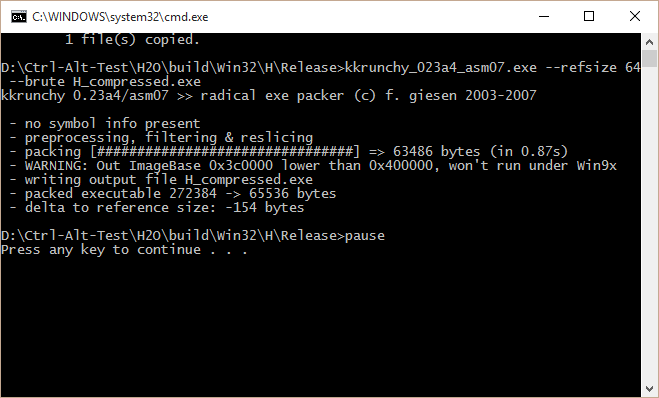
Then, we compress our file (kkrunchy for 64kB intros, crinkler for 4kB intros). Compression slows down the startup time and antivirus software may complain about the file. It’s generally not a good deal. I bet you’ll choose the 300kB file instead. It’s still small, right?

We use compiler optimizations that will slightly slow down the execution to save bytes. That’s not what most users want. We disable language features like C++ exceptions, we give up object oriented programming (no inheritance) and we avoid external libraries – including the STL. This is a bad trade-off for most developers, because this slows down the development. Instead of rewriting existing functions, you’ll prefer the 600kB file.

Our music is computed in real-time (more precisely, we start a separate thread that fills the audio buffer). This means that our musician has to use a special synth and cannot use his favorite instruments. That’s a huge constraint that very few musicians would accept outside the demoscene. They will send you a mp3 file instead. You also need a mp3 player, and your demo is now 10MB.

Similarly, we generate all textures procedurally. And all the 3D models. For that, we write code and this is a lot of work. This adds a huge constraint on what we do (but constraints are fun and make us more creative). While procedural texture have lots of benefits, your graphists will prefer using their normal tools. You get JPEG images and – even if you’re careful – your demo size increases to 20MB.

At this point, you may wonder if it makes sense to write your own engine. It’s hard, error-prone and other people probably made one better than you would. You could use an existing engine and it would add at least 50MB. Of course, it’s still a simple application made by a small team, you can imagine what happens when you scale this up to a full game studio.

So demosceners achieve very small executable sizes because we care deeply about it. In many regards, demoscene works are an art form. We make decisions meant to support the artistic traits we’re pursuing. In this case, we’re willing to give up development velocity, flexibility, loading time, and a lot of potential content to fit everything in 64kB. Is it worth it? No idea, but it’s a lot of fun. You should try it.

Immersion

It’s been 4 years since the last message here. Sorry about that.

It’s time for a quick update. Here is what we did since the last blog post:

  • G – Level One was released at Tokyo Demofest 2014 and got the 1st place. One year later, we made a final version.
  • We released H – Immersion last week at Revision. It ranked 5th (out of 10). If you haven’t seen them, you should check the other prods of the competition.
  • We’ve put the source of Felix’s Workshop on github.

What’s next?

  • We’re working on a final version for Immersion. Sorry that the party version was not polished enough.
  • I’d like to write a detailed making-of article for Immersion.
  • We’re going to update Shader Minifier.

F – Felix’s workshop to be shown at SIGGRAPH 2013

This is the breaking news that crashed into our mailboxes yesterday. The PC 64kB Intro we released last year at Revision, F – Felix’s workshop, has been selected to be shown at SIGGRAPH 2013 as part of the Real-Time Live! demoscene reel event.

Unfortunately we won’t be able to attend SIGGRAPH this year, but to have our work there is quite some awesome news.

Back from Revision

I don’t know if this is going to become some sort of tradition for us, but as a matter of fact, we attended all Easter parties since the creation of our group. This year was no exception, and we had a really great time at Revision.

Revision is the kind of party that is just big enough so even though at some point you think “Ok, I’ve met pretty much every one I wanted”, when you get home you realize how many people you wanted to meet and did not. It’s also the kind of party that is so massively awesome that when you get back to your normal life, you experience some sort of post-party depression, on top of the exhaustion, and you have to get prepared for when it strikes.

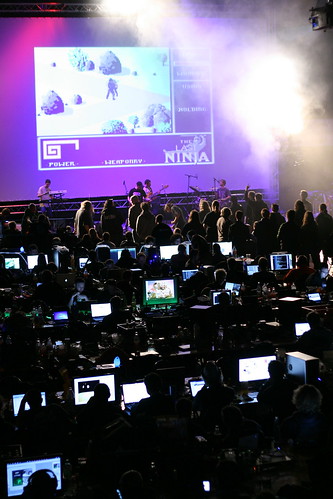
Sidrip Alliance performing at Revision

So we’ve been there, and this year we presented the result of the last months of work in the PC 64k competition. The discussion of the concept started back in May 2011, and we seriously started working on it maybe around August.

While Revision was approaching, rumors were getting stronger about who would enter the competition, how serious they were about it, and how likely they’d finish in time. It became very clear that the competition was going to be very interesting, but even though, it completely outran expectations. It even got mentioned on Slashdot!

Our intro, F – Felix’s workshop, ended up at the 2nd place, after Approximate‘s gorgeous hypno-strawberries, Gaia Machina. The feedback has been very cheerful, during the competition as well as thereafter. Also, as if it was not enough, to our surprise, our previous intro, D – Four, has been nominated for two Scene.org Awards: Most Original Concept and Public Choice. Do I need to state we’re pretty happy with so many good news? :) Thank you all!

Now a week has passed already, we’re back at our daily lives, slowly recovering, and already thinking of what we’re going to do next. :) Until then, here is a capture of our intro:

Shader Minifier 1.1

I’ve just released Shader Minifier 1.1. You can download the binary at the usual place.

Changes

  • New output options: use --format js to generate a Javascript file, and --format c-array to get a comma-separated list of strings (to be included in a C array).
  • Use the new option --no-renaming-list if there are identifiers you don’t want to get renamed (e.g. entry point functions in HLSL)
  • If you have #define macros, Shader Minifier will now avoid conflicts between macros and identifier renaming.
  • If your code has conditions with compile-time known values, they will get simplified (e.g. if (false), or int i_tag = 2; if (i_tag < 4) ...).
  • If there are many identifiers in your code (this probably won’t happen in a 4k intro), Minifier will now use 2-letter names if needed. This is not correctly optimized, but some people use this tool for obfuscation, instead of size-optimization.
  • The option --preserve-all-globals won’t rename any global variable or any function. This is useful if your shader is split between multiple files.
  • You can now tell the Minifier not to parse some block of code. Put your code between //[ and //] and it won’t be parsed, identifiers won’t be renamed, but spaces and comments will still be removed. This is very useful if you want to use features not yet supported in the tool (e.g. forward declarations, or layouts).
  • Other fixes in the parser (macros can be used in a function block, numbers can have suffixes, etc.)
  • Unix support. Use this zip file instead of the standard release, install a recent version of Mono (at least 2.10) and run mono shader_minifier.exe. This should work.
  • Online Minifier. You can use shader minifier online, but only one shader at a time.

Who is using it?

During the last year, many great intros have used it with great success.

  • Another Theory, by FRequency (#1 at Main 2010)
  • white one by Never (#1 at the Ultimate Meeting 2010)
  • anglerfish by Cubicle (#1 at Assembly 2011)
  • RED by BluFlame (#1 at Evoke 2011)
  • akiko by flopi (#2 at Riverwash 2011)
  • fr-071: sunr4y by farbrausch (#1 at Sunrise 2011)

The Easter trip

Every year, we enjoy going to the German demoparty at Easter. It’s always a great party, where we meet our friends again. However, we’ve been invited this year to the Scene.org Awards ceremony in Norway, and it was hard to make a choice between them. We eventually decided to follow Truck’s suggestion and go to both (thanks again Truck, you’ve been extremely helpful). We chose to take ten days of holiday, and visit Norway at the same time (Bergen, Oslo, fjords, etc.). Everything was awesome (and very expensive!).

The Gathering is a good party, it is huge, well organized. There are many compos, seminars, separate area for sceners. Alcohol is not allowed, but there is Easter Garden, a small and cosy place for sceners, next to it. Having both parties is a great idea, as they complement each other. The main problem with The Gathering is that the screen and the sound system are not big enough to cover the whole huge place, so many people (gamers) end up ignoring the compo shows.

Scene.org awards

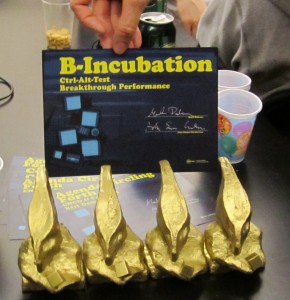
Fairlight statues in front of our nominee certificate.

I’ve been very happy with the Scene.org Award organisation. The team has done a wonderful job, both for the show and the after party, thank you very much for this!

Revision was a great party, with almost the same mood as Breakpoint. Beer was cheap (especially when you come from Norway), organizers were friendly. Revision has been the occasion for Zavie and Cyborg Jeff to release D – Four (ranked 3/11).

Everyone should go to a demoparty at Easter.

Achievement unlocked

We have been taught that B – Incubation was nominated for the Breakthrough Performance category of the Scene.org Awards 2010. Needless to say this was an awesome news, that made our day (and probably the upcoming ones too; being nominated certainly does not mean actually winning the award, but that’s still quite something).

Whoever played a role in this: thank you very much!

As a side note, I’m pretty happy to see that most of the productions I hoped to see being nominated, were nominated. :-)

Shader Minifier 1.0

Since last release, the number of users of GLSL Minifier has increased, while number of bug reports decreased. I think it’s a good reason to move to version 1.0. This obfuscator has been used in a few great intros, such as Another Theory (winner at Main) and White one (winner at tUM). Hopefully we will see many intros using it at Revision.

The main feature of this release is the support for HLSL obfuscation, so we’ll now call this tool “Shader Minifier”. I got pretty good results with it, and I’ve been able to reduce the size of some famous 4k intros. Renaming strategy has been improved a bit; Detailed statistics will come later.

Try it now, download Shader Minifier!

Changes
  • HLSL Support. Please use –hlsl flag.
  • in/out now behave like uniform on global values (requested by several people), you can choose to preserve them.
  • Information on console output is removed unless you use -v (verbose).
  • Spaces in macros are now stripped (thanks to @lx!).
  • New flag –no-renaming to prevent from doing renaming.
  • Various fixes and improvements.

Blurry things

Our last production, E – Departure, is completely music driven and provides some fast camera moves. To make those visually more interesting we use a motion blur, that we happen to be fairly happy with. This article will be about explaining how this motion blur post processing effect is achieved. The shader language used in the code sample is GLSL.

E – Departure

Motion blur in real life

A photo with motion blur

A photo with motion blur

First, let’s take a moment to remind what motion blur physically is. When a photo or a video is shot with a camera, the exposure time (or shutter speed) is a parameter commanding how long the film, or sensor, will be exposed to incoming light. The longer it will, the more light will be caught by the sensor, thus the lighter the image will get, and the more blurry moving elements will get. This can be seen as a drawback (in a dark environment having crisp images gets more difficult) or as a wanted effect (since motion blur conveys a sense of speed).

While the shutter is open, the effect of light on the sensor is more or less constant: all things being equal, a light trail should have a constant lightness. In other words, it’s almost a box filter. I feel this point needs to be stated since some people confuse this effect with the artistic mean consisting of giving more contrast at the base of the trail than at the tail. In photography such an effect can be achieved by firing a flash right before the diaphragm closes (a technique known as rear curtain sync), but this is not the kind of motion effect I am referring to in this article.

Velocity map based motion blur

I’d say there are mainly three ways of achieving motion blur: stochastic based, accumulative based and velocity map based.

The stochastic approach consists in randomly sampling at different points in time and doing a proper weighted average. Trivial in ray tracing, this is difficult to achieve with rasterization but there is research in that direction. Insufficient sampling will lead to noise.

The accumulative motion blur consists in imitating the physical effect by blending together snapshots taken over the duration of the simulated aperture. Doing so is expensive since for each frame the geometry has to be processed and shaded. Insufficient sampling will lead to banding.

The velocity map based motion blur consists in rendering one image of the scene, no different from the regular rendering one would have without blur, and to make every point of this image bleed in some direction according to its speed. To do so, the speed of each point is computed and stored in a buffer: the velocity map. This technique will have the same banding artifacts as the accumulative approach, and some more. This is the technique we chose.

Making three educated steps away from reality

Bleeding is not motion blur

At this point of the description, the velocity map technique is already expected to give a result that is not matching reality. The reason simply being that having object colors bleeding over each other is not equivalent to the accumulation of light during an aperture. Let’s give a simple example to illustrate this.

Viewer’s point of view

Imagine we have a black background, a static red sphere, and a moving white sphere passing in front of the red one. If the snapshot used for the final image is taken at the moment the white sphere is completely occluding the red one from the viewer point of view, the red sphere won’t contribute at all to the final image. With a camera taking a photo, there may be a part of the aperture duration when the red ball is still visible, hence contributing to the amount of light caught by the sensor. Accumulative motion blur will reproduce this effect while velocity map will not.

Expected resulting images

We know this is not accurate, but we are trading accuracy for speed, and as long as we don’t forget this and we accept the resulting quality this is ok. It is all a matter of balance between affordable and physically correct.

Linear motion versus arbitrary motion

Now another inaccuracy lies hidden in the velocity map technique description: the fact that we will make colors bleed in the direction of the speed. The wording suggests that the blur for a given point will always be linear. And this is what will be assumed, since it is way easier to store the representation of a linear move than any other kind of move. But then it means that points moving along a circle for instance, like with a rotation, will have a linear trail instead of a curved one. This approximation works as long as the amount of blur is supposed to be very limited compared to the path. But with elements making fast enough, like small circular moves, this will not work any more and glitches will become noticeable. Should this be a problem, I would suggest instead to store an instant center of rotation for example.

As long as we are using linear operations, we can also avoid computing the speed for each point, and instead just compute it for each vertex and interpolate between them. The benefit of doing so is obvious: the speed will be a varying value computed in the vertex shader, and available thereafter in the fragment shader.

Scatter versus gather

At last, let’s get even farther from reality for a technical reason, still trading accuracy for speed. As explained, we will have two images: a snapshot of the scene, and an image representing the speed of each point. Ideally, we would like to have each moving point bleed over its neighbors according to its speed. Unfortunately nowadays GPU are designed in a way so they can easily gather, but cannot scatter information: in a fragment shader, you can retrieve data from other fragments, but you cannot modify other fragments. So if you want to have one fragment affecting some other one, you have to read it from that fragment. And if you don’t know in advance which fragments are affected, which is the case here, for a given fragment you have to check all neighboring fragments and gather the ones affecting it. If a fragment might affect up to n fragments away, this mean having to check fragments, thus O(n²) (for more on this topic, see chapter 32 of the book GPU Gems 2). This quickly becomes very expensive.

So what we will do here is consider motion blur to be homogeneous enough so we can trade the scattering we would like to do for a simple gather operation. Instead of making our fragment bleed over, we will dilute it among other fragments. This is a strong assumption, that will often prove false. But fortunately, the average result will still look nice, even though some obvious artifacts will appear here and there.

Computing the velocity map

Let’s now get to the implementation part. I am supposing here we have some FBO (Frame Buffer Objects) ready, in order to be able to have efficient render to texture, or the equivalent if the API is not OpenGL. I won’t go into further details about this since it is quite a different topic from what is being discussed here. If you don’t know how to set up and use FBO, at least you now have the keywords and can Google it.

We will need a couple of things to build our velocity map. First we will need a separate buffer to store it. With OpenGL this is done with glDrawBuffers(), which allows to tell which buffers we are going to writen into. By default there is only one such buffer, but we can have various of them; here we just need an additional one. Second we will also need a way to compute the speed of the vertices. The motion blur is a screen space effect, so all we need is the speed in screen space.

During a typical forward rendering pass, each object will have some kind of matrice, pile of matrices, or any equivalent mean to compute its position in world coordinates. The camera is likely to have its own set of matrices, to transform points from world space to camera space, then from camera space to screen space (in OpenGL this last transformation is typically defined by the matrix referred by GL_PROJECTION_MATRIX). The position of a vertex at the given time t is therefore multiplied by each of those matrices to get the final position in screen space. To know the speed of such a vertex in screen space, we just need to know where it was at the time t – dt. If dt is exactly the duration of the aperture, the two positions will define the limits of the motion during that time. This is exactly what we want.

So basically we need a way to retrieve the transformation at t – dt while rendering at t. Using an animation, this shouldn’t be too difficult: you just have to query your system for t – dt. If your animation is ad hoc, like with some real-time interaction, then you may store the previous transformations. Anyway, as long as you have both the previous object transformation position and the previous camera position transformation, you have it all.

In a minimalistic vertex shader, one would have something like the following:

void main() {
  gl_Position = gl_ProjectionModelViewMatrix * gl_Vertex; // equivalent to ftransform(), which is a deprecated function
}

For each object we will feed the shading pipeline with an additional information: the transformation matrix of t – dt. I considered that the projection matrix was unlikely to change fast enough to have any consequence on motion blur, so I decided not to store it, and to use the current one for both the old and the current position. It is up to you to choose your policy, but you have to be consistent when computing the speed in the end. Anyway, this leads to the following new vertex shader:

uniform mat4 oldTransformation;
varying vec2 speed;

vec2 getSpeed() {
  vec4 oldScreenCoord = gl_ProjectionMatrix * oldTransformation * gl_Vertex;
  vec4 newScreenCoord = gl_ProjectionMatrix * gl_ModelViewMatrix * gl_Vertex;
  vec2 v = newScreenCoord.xy / newScreenCoord.w - oldScreenCoord.xy / oldScreenCoord.w;
  return v;
}

void main() {
  gl_Position = gl_ProjectionModelViewMatrix * gl_Vertex; // No change here speed = getSpeed();
}

You may notice that the current position is computed twice (gl_Position and newScreenCoord). I let it this way to make the code easier to read, since it seems the shader compiler will optimize this anyway. Also, you have to be careful about the homogeneous coordinates operation.

From now on let’s retrieve the interpolated speed in the fragment shader and finally store it in the velocity map. A typical fragment shader would look like this:

void main() {
  gl_FragColor = /* whatever */
}

We are simply modifying it the following way:

varying vec2 speed;
vec3 getSpeedColor() {
  return vec3(0.5 + 0.5 * speed, 0.);
}

void main() {
  gl_FragData[0] = /* whatever the fragment color was */
  gl_FragData[1] = getSpeedColor();
}

This is it. At this point we have a velocity map where color represents the motion of each point in screen space. So far so good.

Update: Actually, so far, not so good. The above code contains a bug that I didn’t notice at the time because we rarely met the conditions to make it visible. But since then it has been bugging me as we have been working on a scene that exhibits it pretty badly.

When polygons get clipped, it may lead to broken speed values, resulting in annoying strong blur artifacts. The reason behind this is the non linear operation consisting in dividing by the w component in the vertex shader, that brings wrong values after clipping.

To solve this, I suggest not dividing in the vertex shader and pass the w component to the fragment shader in order to divide only at that time.

Using the velocity map and applying the blur

Once the color buffer and velocity map are filled, the post processing pass will use both to generate the motion blurred image. This is done very simply: while in a very minimal blitting shader you would have something like the following,

uniform sampler2D colorBuffer;

void main() {
  gl_FragColor = texture2D(colorBuffer, gl_TexCoord[0].xy);
}

here it becomes

uniform sampler2D colorBuffer;
uniform sampler2D velocityMap;

vec4 motionBlur(sampler2D color, sampler2D motion, vec2 uv, float intensity) {
  vec2 speed = 2. * texture2D(motion, uv).rg - 1.;
  vec2 offset = intensity * speed;
  vec3 c = vec3(0.);

  float inc = 0.1;
  float weight = 0.;
  for (float i = 0.; i <= 1.; i += inc) {
    c += texture2D(color, uv + i * offset).rgb;
    weight += 1.;
  }
  c /= weight;
  return vec4(c, 1.);
}

void main() {
  gl_FragColor = motionBlur(colorBuffer, velocityMap, gl_TexCoord[0].xy, 0.5);
}

In this example, the inc value will define a 10 fetches motion blur. It proved to be sufficient in our case, and even as little as 8 fetches could be enough for moderated blur. With 20 fetches it becomes really hard to notice artifacts, but it is also slower of course.

The function argument intensity controls the length of the motion trails. You can set it to be consistent with your rendering speed, or low for a fainter effect, of high for an exaggerated effect.

Dealing with precision matter

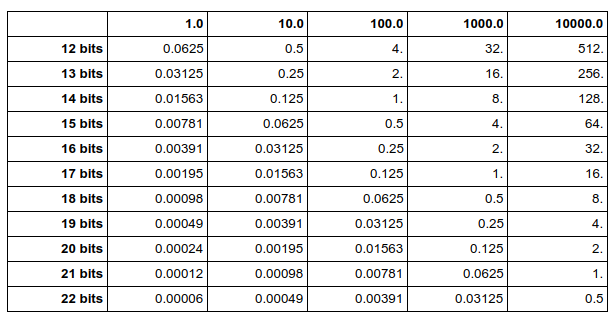
At this point, I had a nice looking motion blur already, but I noticed it tended to introduce instability at low speeds. This is due to the fact that low speed means short velocity vector, which being stored with two integers loses precision both in speed and direction. To overcome this issue, I decided to represent differently the velocity vector.

First, instead of storing its components, I stored the components of the normalized velocity vector on one side, and the norm on the other side. This dealt with the direction problem.

Second, I applied the very same trick gamma correction relies onto: using the power function to increase the precision of low values, at the cost of precision for high values. The norm would then be stored in non linear space, and transformed back when using it. Since varyings are interpolated linearly, we have no choice but stay in linear space in the vertex shader, and change for non linear space only in the fragment shader.

So in the vertex shader, once we have our per vertex speed vector we store it this way:

varying vec3 speed;

vec3 getSpeed() {
  vec2 v = /* ... */
  float norm = length(v);
  return vec3(normalize(v), norm);
}

While in the fragment shader the color we write becomes:

vec3 getSpeedColor() {
  return vec3(0.5 + 0.5 * vSpeed.xy, pow(vSpeed.z, 0.5));
}

During the postprocessing pass, the speed is then read this way:

vec3 speedInfo = texture2D(motion, uv).rgb;
vec2 speed = (2. * speedInfo.xy - 1.) * pow(speedInfo.z, 2.);

Update: again, for the reason mentioned above, this code has to be changed and norm has to be computed in the fragment shader. I am too lazy to fix the code here so this is let as an exercise to the reader. ;-)

Bugs and limitations

Motion blur artifacts

Motion blur artifacts

Just like said, each trade off introduces inaccuracies, that result in visual artifacts. The most important one is obviously the scatter vs gather one. You can see the visual cost implied here: notice the ghost effect visible on the edge of some elements.

Another problem is how to manage the edges of the image. When an object is moving near the border, the algorithm may try to fetch colors outside the image. In that case, I see three solutions: leaving it as is if this is fine in your case (it might simply not happen often enough to be a problem), clamping the fetch to the border (this is what is done in E – Departure; notice how it affects the right side of the sample screenshot), or generating a bigger image to have a thin space outside the displayed frame where colors can still be fetched.

Those problems though are difficult to notice at low speed, and will appear only briefly at higher speed. So for E – Departure, this was an acceptable trade off.

Conclusion

I presented here a technique fairly simple to implement, allowing to get an effect which is visually pleasing, and that noticeably increases the realism of the image for a limited cost. It played an important role in our demo; I hope you will find a good use for it too.